top of page
Search

The Blessing of Bread and the Joys and Grief of Baking Sourdough Bread

Writer's picture: Tathel MillerTathel Miller

Yes, there is both joy and grief in baking sourdough bread.  And before we go any further, please know I am not an expert bread maker.  I have made sourdough bread on and off for several years–tried a few different recipes. My favorite sourdough bread recipe is made with potato flakes, whereas you may find other bread makers baking other types of sourdough bread.  This is what has worked for me in the past–and not worked on some “not so good” days.


If you are familiar or seen some of the content creators who identify themselves as “homesteaders”--you may have seen them dressed in Victorian and prairie style dresses working in “perfect” updated kitchens.  And their breads are picture perfect too–works of art. You don’t need any of this to be a bread maker. All you need is a few ingredients, lots of patience, and the willingness to try. 


Bread is a blessing.


Currently I am using Kara Courtney’s recipe shared on her blog, Wildwood Wonder. I’ll link her story and recipe below.  What I like about Kara’s story with sourdough bread making is she is honest and admits “killing her starter”--which I have done many times!


All of this is in Kara's recipe, but here are the staples you will need to get your starter going and bake sourdough bread:

  • Bread Flour or All-Purpose Flour

  • Oil

  • Sugar

  • Salt

  • Instant Potato Flakes

  • Filtered Water

  • Yeast

  • Butter (optional)


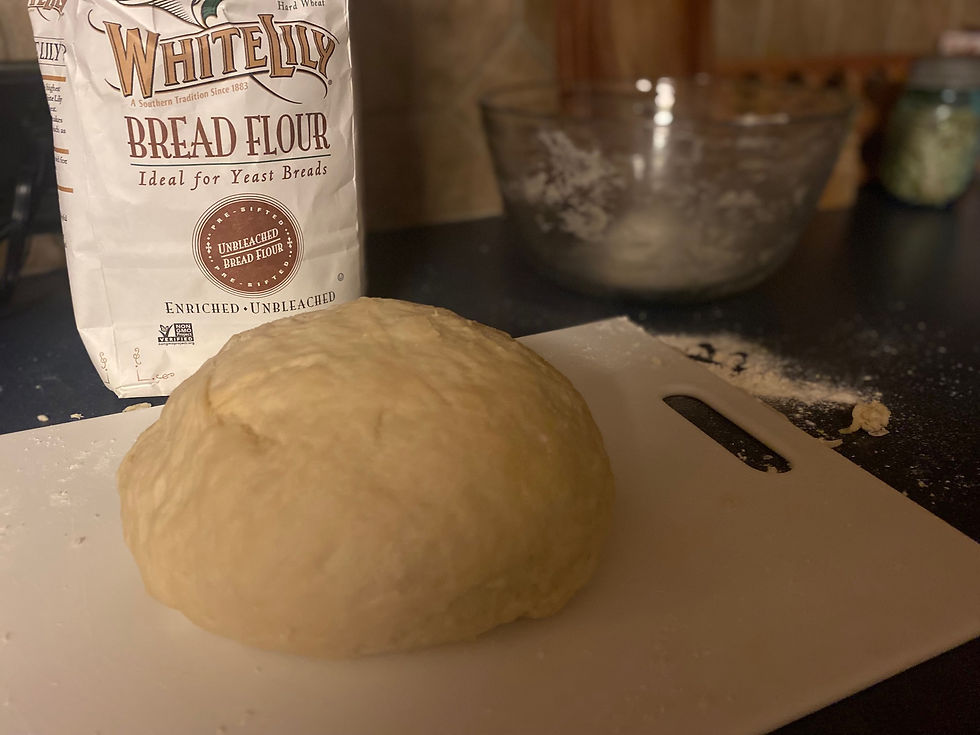
I'm not going to try and explain every step of making sour dough bread--Kara has done a wonderful job in explaining step by step how to make your starter to baking your loaves. But I will share some tips I've learned and photos I have taken during my sourdough bread making journey.

I have two starters going at the present time. Their names are Fred and Wilma. I would not recommend this unless you are planning on making lots of bread. I plan to gift one of these starters once it is healthier. This photo was taken a few hours after feeding the starters. Notice the bubbles--this means your starter is working! Yay!
*Tip: Never use a metal spoon or metal utensil when stirring your starter. The metal reaction to the yeast could kill your starter. Always use a wooden spoon. (Learned through research--and failures)  And look at all those bubbles!  That's what you want to see!
*Tip: Never use a metal spoon or metal utensil when stirring your starter. The metal reaction to the yeast could kill your starter. Always use a wooden spoon. (Learned through research--and failures) And look at all those bubbles! That's what you want to see!
Making the bread--one thing different about this recipe than other recipes I have used in the past is to add the flour gradually.  I stir about three of the six cups of flour into the liquid mixture first and then add the remaining three cups, using my hands to work the dough into a ball. Use a small amount of flour as you are working and kneading the dough.  Kneading the dough is the most important part--set a timer for five minutes, Kara suggests and she explains, it's a good hand and arm workout--good therapy!
Making the bread--one thing different about this recipe than other recipes I have used in the past is to add the flour gradually. I stir about three of the six cups of flour into the liquid mixture first and then add the remaining three cups, using my hands to work the dough into a ball. Use a small amount of flour as you are working and kneading the dough. Kneading the dough is the most important part--set a timer for five minutes, Kara suggests and she explains, it's a good hand and arm workout--good therapy!
Pour a small amount of oil into another bowl and place your dough ball into the bowl.  Cover and let rise for twelve to 24 hours. This will depend a lot on the warmth of your home and other conditions.  Here again is where your patience is needed!
Pour a small amount of oil into another bowl and place your dough ball into the bowl. Cover and let rise for twelve to 24 hours. This will depend a lot on the warmth of your home and other conditions. Here again is where your patience is needed!
A beautiful sight when your dough rises like it should! Now comes the fun! Take your fist--yes, your fist and punch down the dough and knead again, getting out all the air bubbles. Now you are ready to divide your dough into individual loaves. *Tip: Tuck the corners under to make a prettier loaf--sometimes it works--sometimes not.    I usually make three and because my pans are three different sizes--they usually look like a meal for The Three Bears--large, medium, and baby size  loaves. You can use any kind of loaf pans.  Glass is working best for me right now.
A beautiful sight when your dough rises like it should! Now comes the fun! Take your fist--yes, your fist and punch down the dough and knead again, getting out all the air bubbles. Now you are ready to divide your dough into individual loaves. *Tip: Tuck the corners under to make a prettier loaf--sometimes it works--sometimes not. I usually make three and because my pans are three different sizes--they usually look like a meal for The Three Bears--large, medium, and baby size loaves. You can use any kind of loaf pans. Glass is working best for me right now.
Cover with a towel or parchment paper and let the loaves rise until doubled.  Again this will depend on the warmth of your home--typically 6 to 8 hours--possibly longer. I believe Kara suggests longer in her recipe. *Tip: I have placed the loaves in my oven with the light on to speed up the process--covering them with parchment paper. Just remember, the light adds more warmth than you realize. I wouldn't recommend keeping the light on if you are not going to be home. Once the loaves have risen, you are ready to bake your bread!
Cover with a towel or parchment paper and let the loaves rise until doubled. Again this will depend on the warmth of your home--typically 6 to 8 hours--possibly longer. I believe Kara suggests longer in her recipe. *Tip: I have placed the loaves in my oven with the light on to speed up the process--covering them with parchment paper. Just remember, the light adds more warmth than you realize. I wouldn't recommend keeping the light on if you are not going to be home. Once the loaves have risen, you are ready to bake your bread!
I brush the tops of my loaves with a little melted butter while they are cooling.

And a little apple butter is always good on warm bread!


So what's the grief and often times disappointment in sourdough bread baking? Your starter can die for no reason--or at least mine has on a few occasions. You believe in your heart you have done everything right and your bread dough doesn't rise. Just this week, my dough didn't rise well. Waking up to dough sitting in the bottom of the bowl covered in oil is disappointing to say the least. And to be perfectly honest--it's time consuming and can be expensive if you are baking bread more than once a week.


Then pray tell what makes a person go back or even begin on this sourdough bread baking journey--where's the joy in it all?


Well for me....

It's my Grandson after his fourth piece saying, 'Granna, this bread sure is good! The best bread I've ever tasted!'


It's the text from a friend who shared her loaf with her elderly mother. 'Me and Mom enjoyed it with our supper! It's so good!'


And it's a reminder of goodness and life--


Baking bread reminds me of Ruth going to the barley fields day after day gleaning so she and Naomi would have bread to eat.


Baking bread reminds me of the story of the young boy with five barley loaves and two fish--asking myself questions such as, who made these loaves of bread for this young boy--was it his mother--grandmother? Did he buy them at the market? And then the miracle of Jesus taking this boy's lunch and feeding more than the five thousand--the twelve baskets of leftovers--


Baking bread reminds me that God not only provides us with the nourishment of bread for our bodies, but for the gift of the True Bread of Life.


And Jesus said unto them, I am the bread of life: he that cometh to me shall never hunger;

and he that believeth on me shall never thirst.

(John 6:35)


Give us this day our daily Bread

(Matthew 6:11)


A humble thank you for reading this week's story. I pray in some small way you have receive a blessing and be encouraged. It's perfectly fine if you have no interest in baking bread--but next time you are at a farm stand, farmer's market, or at a place where homemade breads are sold--buy a loaf and savor in the goodness of homemade breads.

To learn more about Farmer Rhodes Granddaughter and why sharing stories are dear to my heart--more of my story can be read here, https://www.farmerrhodesgranddaughter.com/about

My prayer is to share in this space on Wednesdays--two Wednesdays a month--maybe more.

If you would like to be added to my email list, you can subscribe at the link below (scroll to the bottom of the home page to sign up) . And you can choose to be a part of our community on our social media pages on Facebook and Instagram--we would be humbled and honored for your presence there. Thank you again!


48 views0 comments

Recent Posts

See All

Opmerkingen


Let us rise up and build. So they strengthened their hands for this good work.

Nehemiah 2:18

Join our mailing list

Thanks for submitting!

  • Black Facebook Icon
  • Black Instagram Icon
  • Black Pinterest Icon

© 2023 Farmer Rhodes Granddaughter .

Created with Wix.com

bottom of page